Support Peas, Beans, Cucumbers, and Vining Plants
The Almanac Garden Planner - Use It Free for 7 Days!
Plan your 2025 garden with our award-winning Garden Planner.
Learn how to build trellises and supports for climbing vegetables such as peas and beans, as well as grapes, roses, and other vining plants! See printable instructions as well as a video for creating a simple support frame for your plants.
Climbing plants trained up supports need less weeding, and can be used to create an attractive leafy backdrop or windbreak for your garden. In addition, growing vertically means that you can pack in more sprawling plants, such as squashes and melons, into your space. When it comes to edibles, it’s also a lot easier to harvest when standing up.
Canes, Poles, and Stakes
The simplest supports include sturdy stakes, poles, and bamboo canes. Push them securely into the ground at the base of plants to offer an immediate vertical hook for vining veggies to grip onto. You may need to tie in young plants to their supports at first to encourage them in the right direction.
Canes or poles can be arranged in traditional rows with a horizontal cane linking the tops to create a rigid structure. Tie in the canes where they cross with string, twine, or wire.
Or why not create an attractive bamboo tepee? Space four to eight canes or poles around a circle marked out in the ground. Tie the canes together about a foot from the top using string or wire. Bamboo and willow tepees are perfect for climbing peas and beans, while taller, sturdier tepees made of thicker poles are recommended for heavier climbers such as squashes and melons.
Trellising
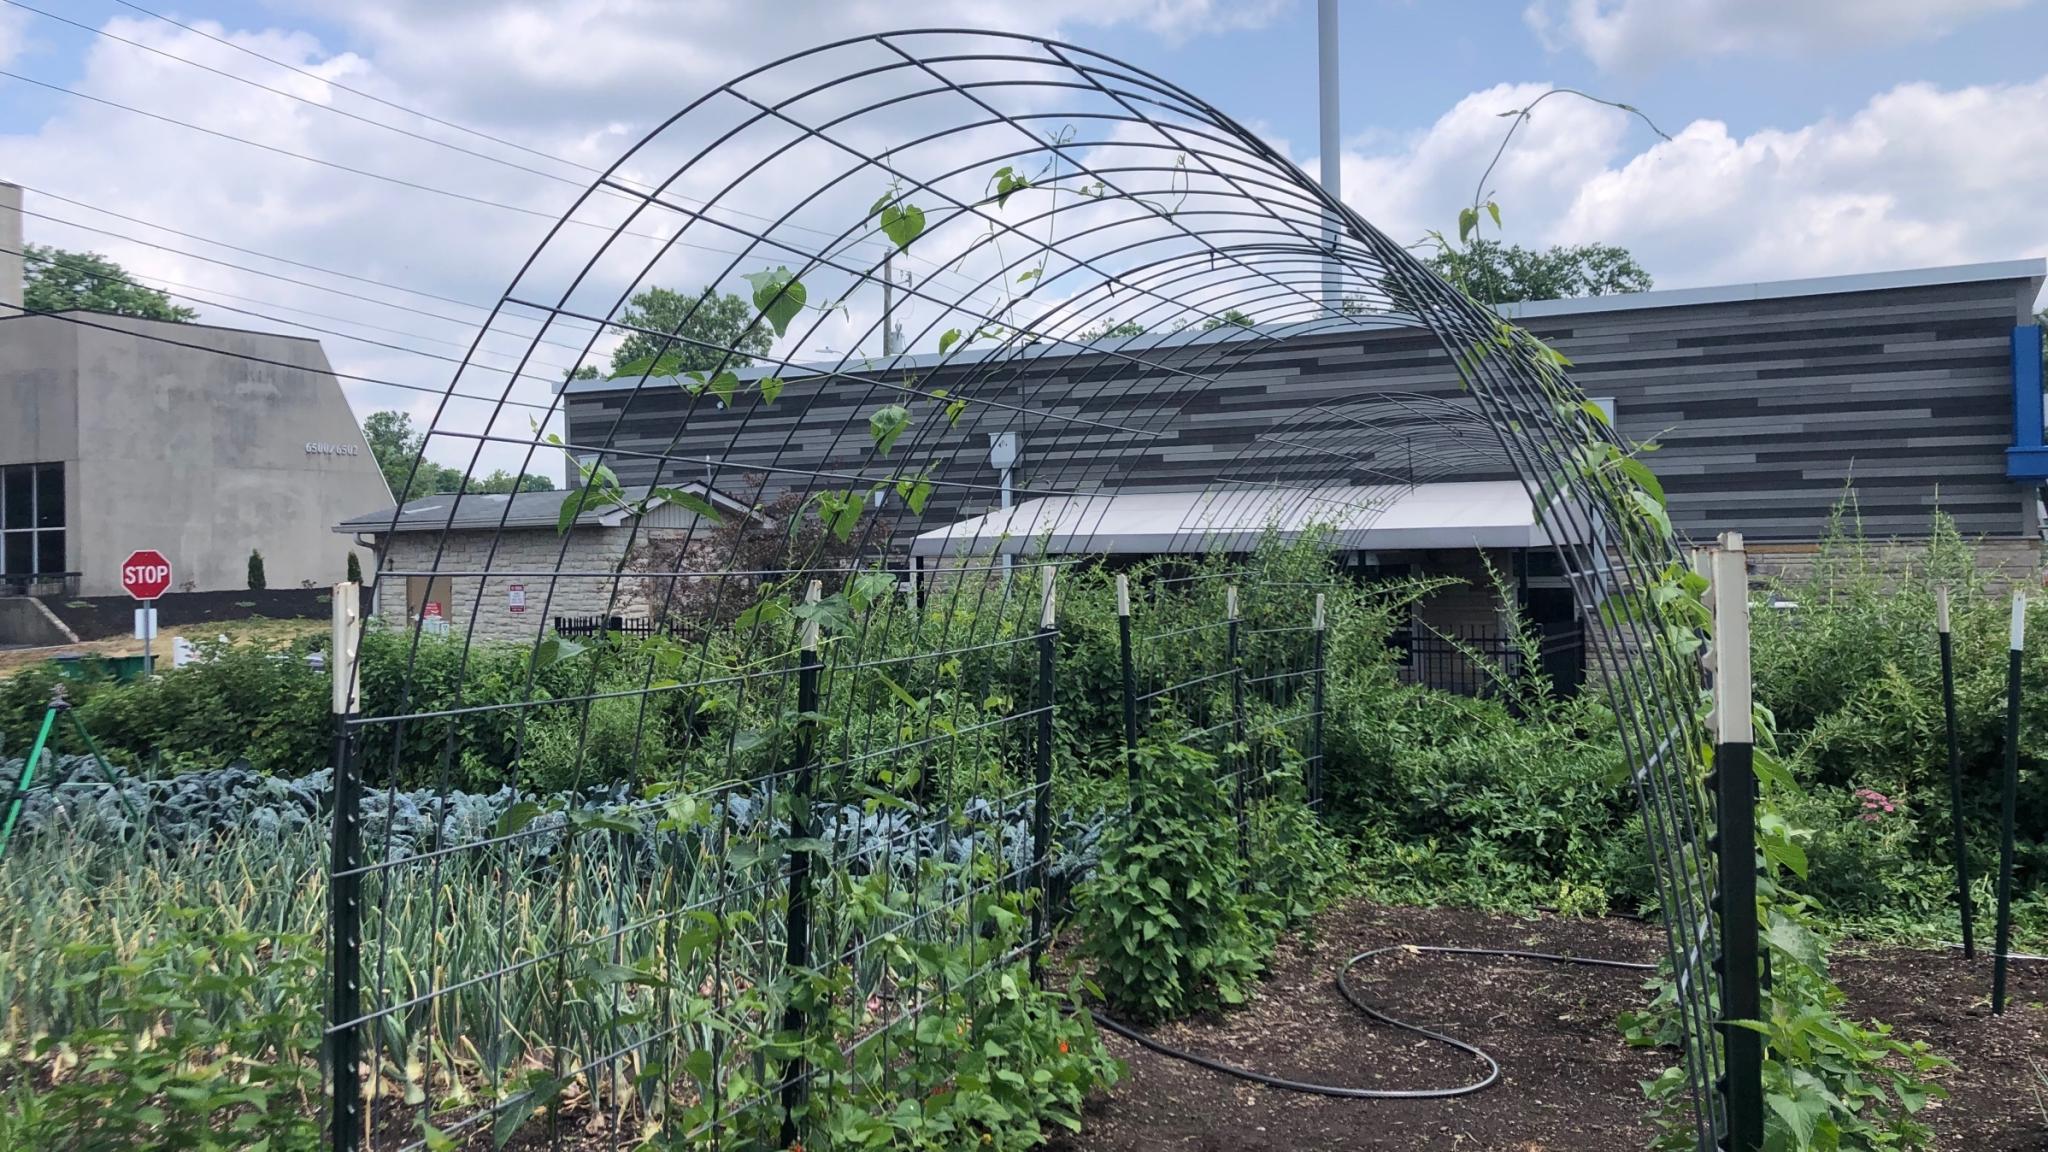
Use trellises for growing beans, peas, squashes, and more. A simple cattle panel trellis does the job effectively for a reasonable cost. It’s a wire arch made from a piece of common farm fencing you can find at a Tractor Supply or farm supply store. The panel is bent into an arch and attached to stakes hammered into the ground.

The Best Bean Frame
We’ve discovered the ultimate solution for growing beans, using bamboo canes positioned in such a way that the pods hang outwards, away from the frame, which makes them much easier to spot and pick. The stems are also less likely to grow into a thick, tangled mess.
We demonstrate how to make the bean frame in the video.
To make the frame you will need the following materials and tools:
- 2x lengths of timber: 2in x 2in x 32in
- 2x length of timber: 1in x 2in x 5ft
- 2x lengths of timber: 2in x 2in x 7ft 4in
- 2x 4in screws
- 2x 2.5in screws
- Screwdriver
- Drill with drill bit to match width of the screws
- Sandpaper
- Pencil
- Tape measure
- 12 or 14 bamboo canes, 7ft long
- Garden wire or string
How to make the frame:
- Start by sanding down any rough edges to the timber using the sandpaper. Now join together the top of the frame, screwing the 5ft lengths of timber to the 32in lengths. To prevent the wood from splitting, drill pilot holes one inch in from both ends of the two 5ft lengths of timber. Screw these to the ends of the 32in lengths using the 2.5in screws.
- The rectangular top of your frame is now ready to screw to the 7ft 4in uprights. Measure and mark halfway along the two 32in sides of the top section. Drill pilot holes through these two points. Screw the top section to the uprights using the two 4in screws.
- Next, dig two holes to accommodate the uprights. Then lift up the frame and bury the uprights into the ground, backfilling the holes and firming in with your boot to get a good, tight finish. A hole that’s at least one foot deep will work best.
- Set the bamboo canes at equal distances along both sides of the frame. Push them into the ground to get an even finish along the top of the frame, and tie them in with wire, twine or string.
- Now plant your beans, one to each cane. It won’t take long for the stems to latch onto the canes and begin twining round.
Share Your Ideas
Climbing vegetables are a must for gardeners looking to pack more into their plot. If you’ve got any ideas for home-made supports please do share them by dropping us a comment below!
ADVERTISEMENT
I had some left over chicken wire from a long roll I bought to fence in my garden. I also had a newly erected metal shed. I drilled some holes in the shed panels about 5 feet up, and attached the top of each 5.5 foot chicken wire panel in the two top corners with machine screws and washers to anchor the wire. I anchored the bottom of the chicken wire panel to the ground about 1 foot away from the shed. Before starting I had prepared the ground right under the chicken wire panel to receive my seeds and plants. I put panels on south and west sides of the shed for sunlight, and have planted one for beans, one for peas, one for cukes and one for melons. I have tried putting the plants on both sides or the wire panels, but find that the ones on the outside are a lot easier to weed.
2 pieces 6 foot rebar driven 2 feet in the ground at a slight (15 degree) angle, taking advantage of more southern sunlight exposure. Attach a cattle panel to the rebar with zip ties. Your done!
I cut bamboo to create a trellis for pole beans. It is attached to a chain link fence for stability using zip ties and horizontal stalks every 8 inches or so, super sturdy! It can be as tall as your bamboo stalk which can be really high! I also used the bamboo for tomato teepees, pushing the stalks into the ground and using zip ties again at the top.
I use leftover square PVC spindles from a deck rail installation I did 10 years ago. I drilled holes through each spindle and all the way up each spindle, 2" apart. Then used nylon string to thread back and forth to create a climbing fireplace for my peas and beans. The PVC is easily cleaned and stored for the next year, Nd string is inexpensive. The hollow PVC pushes easily into the soil.
You need any sturdy pole (wooden or PVC pipe) to dig into ground with at least 6 feet above the ground. Attach an old bicycle wheel horizontally on the top of the pole (I got mine from the landfill). Plant your pole beans in the circle around the pole (about 4 feet in diameter). I put seeds (soaked overnight) every 2 inches and then thin them. When plants emerge and reaches some 6 inches I use any kind of twine or thin rope cut in peaces a little longer than double distance from the ground to the bicycle wheel. Then I tie one end of the twine to the staple what I stick into ground at the base of the plant (we just cut thicker wire in 1 foot peaces and bend it in the middle), go up to the wheel and then down to attach to another staple at the base of the next plant. You get nice airy tower when you are done. When the plants start growing help them from the beginning wrapping around the twine. Soon they will catch up and go up by themselves. Usually I move my pole to other spot every 2 years. Staples get rusty but who cares! If you use heavier synthetic twine you can reuse it next year too after washing it but it takes more time in the fall to pull vines from the twine. When you use some organic twine then just pull out staples, cut it at the top and straight to compost pile they go. Makes very attractive accent green blooming tower in the garden. Easy to harvest.
I make an easy trellis from driving a 1 inch pipe or any suitable equivalent in the ground every 6 feet (my cucumber row is about 12 feet = 3 posts) then stretching nylon twine back and forth at around 1 foot intervals. Make sure to use posts that are about 5 to 6 feet long and get them in the ground leaving approximately 4 feet above ground. I get lots of compliments from the neighbors about how nice it looks.
Quickcrop.ie are promoting an A frame for peas that they have copyright. Think I'll make my own thanks .
are there any problems with harvesting seeds from spring 2018 planting of boc choi and replanting them for a 2018 fall crop. thanks in advance bill mac
I've found that the cane poles break too easy but the cedar ones hold up good.
If your climate allows you to have fall plantings, then no problem! You can certainly use the seed from an earlier crop of the same year to plant again later on, as long as they had been harvested/stored properly. One thing you do have to be aware of is that if your bok choy was a hybrid, then its seeds may not come true, meaning that the offspring may not have the same characteristics as the parent plant. Planting in late summer will give you a fall harvest. Or, if your climate allows, you can plant in fall for a winter harvest. Be sure to keep soil cool and moist in the summer to reduce stress for these cool-loving plants and deter bolting. Good luck!


